Published
3rd May 2019
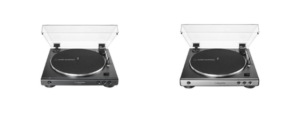
Question: How do I set up my AT-LP60XUSB turntable?
Answer: Proper setup of the AT-LP60XUSB will ensure that the turntable will perform to its full potential. Please note that if the belt is not placed properly on this turntable, the turntable may not seem like it is getting any power when the start button is pressed. Follow the steps below to properly set up the AT-LP60XUSB turntable.
Belt and tonearm setup
- Carefully remove the turntable from the packaging and verify that all of the parts and accessories are present. You should have:
- Die-cast aluminum platter with the drive belt attached to the bottom ring of the platter
- Audio-Technica slip mat
- Dust cover and two dust cover hinges
- Power supply
- USB cable
- Analog audio output cable (3.5 mm male to dual RCA male)
- 45 RPM adapter
- Quick Start Guide (full owner’s manual available for download here)
- Place the platter on the turntable’s center spindle, making sure the platter is fully seated.
- Rotate the platter by hand until the large rectangular opening with the red ribbon is positioned in the upper left corner of the turntable (the 10 o’clock position). This will expose the brass-colored motor pulley. (Note: make sure you are exposing the brass pulley and not the white plastic post at the 2 o’clock position.)
- While holding the platter steady, remove the tape holding the red ribbon to the platter, then use the ribbon to guide the drive belt (attached to the underside of the platter) over the brass motor pulley. Make certain the belt is properly seated on the motor pulley so it is riding in the pulley’s groove. This is important to ensure that the turntable operates at the proper speed. Also, verify that the belt is not twisted on the motor pulley.
- Once the belt is properly installed on the motor pulley, you may remove and discard the red ribbon.
- Place the slip mat on the platter and (with the tonearm still fastened to its rest) rotate the platter ten times in the clockwise direction. This is to make certain the automatic mechanism is fully cycled.
- Remove the plastic tie that is securing the tonearm to its rest and discard the plastic tie.
- While holding the tonearm in the rest position, carefully remove the plastic stylus guard by slowly pulling the guard forward. Be careful not to damage the stylus. If the stylus does come off, you may refer to this previous blog post to learn how to reinstall the stylus.
- The provided dust cover is designed to protect the turntable when not in use and may be closed when records are playing. Insert the two dust cover hinges on the rear of the turntable and then insert the dust cover onto the hinges.
- Connect the power adapter cable to the turntable and plug the adapter into a convenient AC outlet.
USB connection setup
- Plug the USB cable’s Type B connector into the rear of the turntable and plug the Type A connector into your computer.
- You may use any recording software that allows an input signal from a USB digital audio device. The free, downloadable program called Audacity is a popular choice, and you may find helpful information on using the turntable with Audacity in this previous Question of the Week post.
Analog connection setup
- Connect the analog audio cable’s 3.5 mm plug into the “Analog Out” port on the back center of the turntable. Then plug the RCA end (red and white plugs) into your desired playback device (commonly a stereo receiver or powered speakers).
- If connecting to inputs on a stereo receiver specifically labeled “PHONO,” move the switch on the rear of the turntable to PHONO. This bypasses the turntable’s internal RIAA magnetic phono preamp, which isn’t needed since the stereo receiver’s PHONO input has the same RIAA magnetic phono preamp. If the switch is set to “Line” you may hear considerable amounts of distortion.
- If connecting to any other input on a stereo receiver (Aux, Line, Tape, CD, etc.) or connecting directly to powered speakers, move the switch on the rear of the turntable to LINE. This engages the turntable’s internal RIAA magnetic phono preamp. If the switch is set to “Phono” you may have little or no sound at all.
- If connecting the turntable to a 3.5 mm analog AUX input on a speaker or receiver, you may use a 3.5 mm stereo AUX cable (not included). No need for additional adapter cables.
The entire setup process may be viewed in the following video.