Toms can be the most difficult drums in your kit to capture successfully. Details like clear tom sound will really ramp up the quality of your drum mix. The finer points can be the crucial difference between a good track and a great track.
Use these drum-recording tips to get those details just right in your recording!
3 Steps for Recording Toms
 1. Select a Microphone Type
Condenser microphones, like the AE3000, offer a more open hi-fi sound while dynamic microphones, like the ATM250, offer more punch and a tighter pickup pattern.
1. Select a Microphone Type
Condenser microphones, like the AE3000, offer a more open hi-fi sound while dynamic microphones, like the ATM250, offer more punch and a tighter pickup pattern.
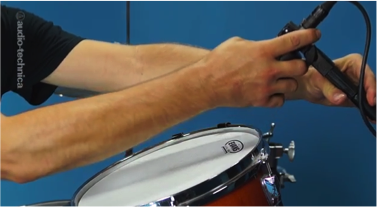 2. Position the Mic
Positioning the microphone closer to the tom will create more low-end and reduce the bleed from the rest of the kit. As you move the mic back, the drum will open up. Aiming the mic at the center of the tom will yield more attack, while a more straight-up and down position will emphasize the overtones. Play with the positions to find what’s best for your unique style.
3. Mind the Cymbals
Since every kit is different, the position of the tom mics has to account for where the drummer has placed his cymbals. Place the mics as far off-axis as possible to mitigate bleed, especially from the ride cymbal. Aiming the mic away from the snare can also limit bleed.
2. Position the Mic
Positioning the microphone closer to the tom will create more low-end and reduce the bleed from the rest of the kit. As you move the mic back, the drum will open up. Aiming the mic at the center of the tom will yield more attack, while a more straight-up and down position will emphasize the overtones. Play with the positions to find what’s best for your unique style.
3. Mind the Cymbals
Since every kit is different, the position of the tom mics has to account for where the drummer has placed his cymbals. Place the mics as far off-axis as possible to mitigate bleed, especially from the ride cymbal. Aiming the mic away from the snare can also limit bleed.
Published
25th March 2014